Set the WebDAV Authoring Rules for Virtual Directories
You are on the target machine and the Internet Information Services (IIS) Manager is open.
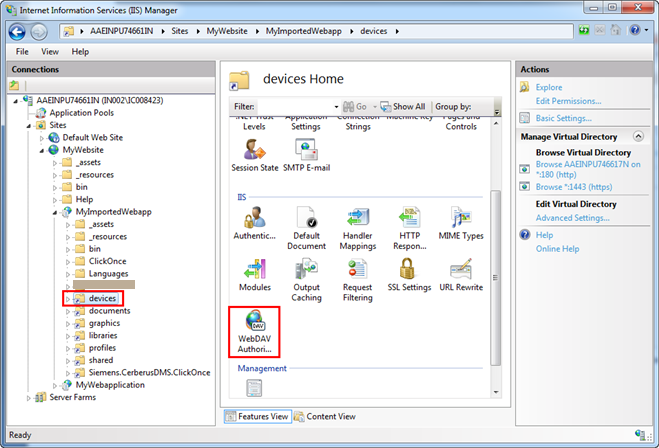
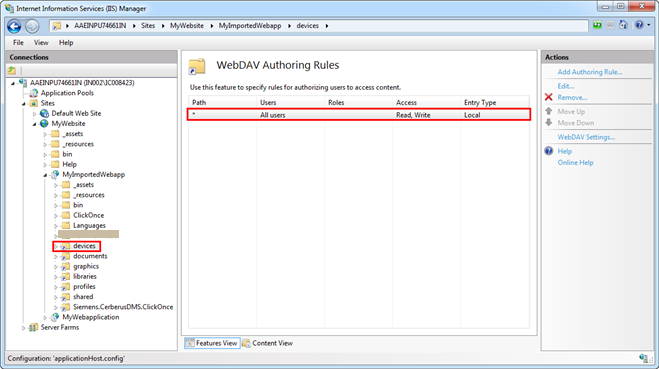
Select Sites > [website] > [web application] > [Virtual Directory] for which you want to enable the WebDAV Authoring Rules and double-click WebDAV Authoring Rules.
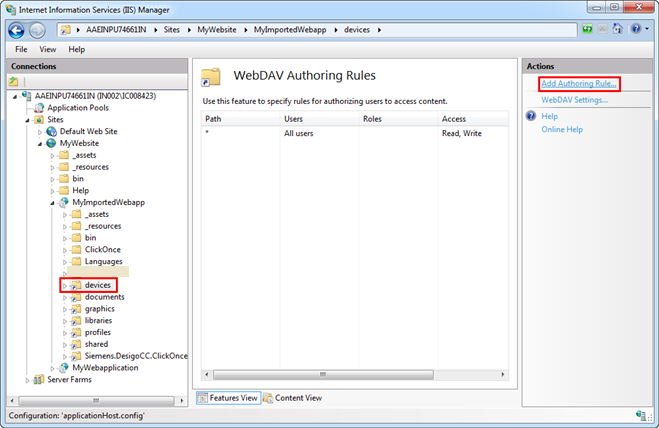
In the Actions pane, click Add Authoring Rule.
The Add Authoring Rules dialog box displays.
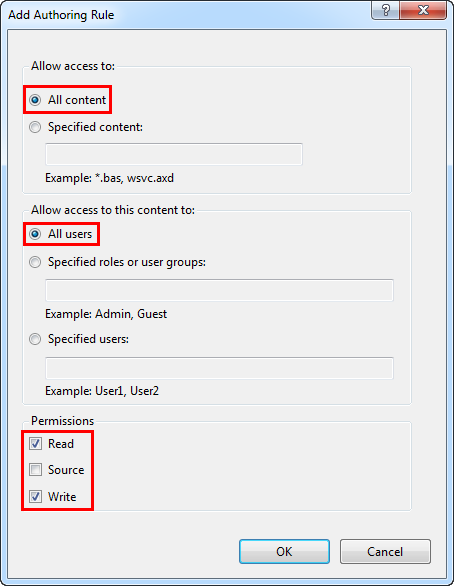
In the Add Authoring Rule dialog box, do the following:
In the Allow access to section, select the All Content.
In the Allow access to this content to section, select All users.
To set the permissions in the Permissions section do the following: a. Go to the path [Installation Drive]:\[Installation Folder]\GMSMainProject\_tmpGMSWebSite\[virtual directory] on the source machine. b. Open the config file. c. Check the access rights in this file. d. In the Permissions section of the Authoring Rules dialog box, select the exact permissions, Read, Source, and Write. For example, for the devices virtual directory you must open the config file located at path [Installation Drive]:\[Installation Folder]\GMSMainProject\_tmpGMSWebSite\devices and the access entry is access = rw”, where r = read, and w = write permissions. In the Permissions section of the Add authoring Rule dialog box, you must select the Read and Write check boxes.
Click OK.
The WebDAV Authoring Rule entry is added successfully.
Repeat steps 3a to 3d for each virtual directory. For the ClickOncevirtual directory, in step 3d, set the Permission as Read.
The WebDAV Authoring Rule entries are added successfully for all the virtual directories, including ClickOnce.